Reliable Protection for Your Plumbing
Installing the Suds-N-Flood Tamer Check Valve
The Suds-N-Flood Tamer Check Valve offers a dependable solution to prevent backflow issues across various fixtures. Whether for sinks, disposals, or water closets, this check valve ensures your plumbing is protected from suds, sewage, and flood-related problems. Follow these straightforward installation steps to safeguard your home or business.
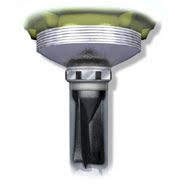
Installing the Suds-N-Flood Tamer on Sinks
The Suds-N-Flood Tamer Sink Waste Check Valve is designed for easy installation in both single and double compartment sinks. Follow these simple steps to ensure proper installation and optimal performance:
- Mount the check valve directly in the tailpiece and ensure it’s positioned below the basket cross bars.
- For double compartment sinks, install the check valve under the tee using cross bars or beneath each individual basket to ensure each sink compartment is properly protected.
- Avoid using cross bars that come with the check valve when the valve’s top will sit less than one inch below the basket’s cross bars.
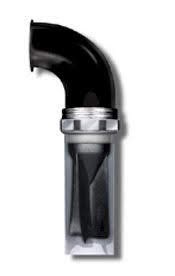
How to Install the Suds-N-Flood Tamer in Disposals
Installing the Suds-N-Flood Tamer in your disposal system is a straightforward process that provides effective protection against backflow and ensures smooth operation. Follow the steps below to secure your disposal from suds, sewage, and water backups.
- Install a 1-1/2″ solder bushing or slip coupling and tailpiece to prepare the disposal for the check valve installation.
- Position the Suds-N-Flood Tamer Check Valve in the tailpiece, ensuring it is properly aligned. Use a 1-1/2″ slip joint nut to secure the valve in place.
- For added stability and secure fitting, always use cross bars with disposals. This ensures the valve functions optimally and prevents any potential dislodgement during operation.
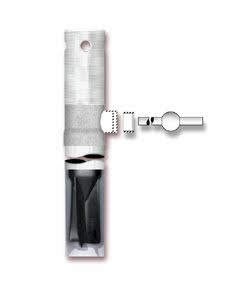
Efficient Backflow Protection for Lavatory Sinks
Ensure your lavatory remains free from backflow issues with the proper installation of the Suds-N-Flood Tamer. Follow these simple steps to keep your drainage smooth and protected against suds and sewage backups.
- Begin by installing a 1-1/4″ x 1-1/2″ solder bushing or slip coupling into the lavatory’s drain line.
- Position the check valve inside the tailpiece, securing it with a 1-1/2″ slip joint nut to ensure a snug fit.
- Complete the installation by attaching a 1-1/2″ trap, which helps to ensure efficient drainage while preventing suds and water backflow into your lavatory sink.
Water Closet Installation
Seamless Integration for Optimal Flushing Performance
Installing the Suds-N-Flood Tamer in your water closet is essential for preventing sewage and suds backups. Follow these steps for a successful installation that enhances flushing efficiency and protects your plumbing system.
Instructions for Installation:
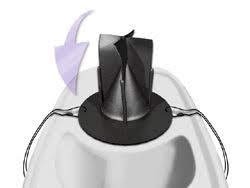
Placing the Check Valve
- Turn the bowl upside down on the floor.
- Thread a piece of string (approximately 12 inches) through the holes in the lip of the check valve.
- Position the check valve over the horn of the bowl.
- Fish the lower ends of the string through the closet bolt holes.
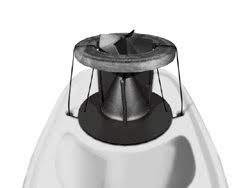
Placing the Foam Gasket
- Pull the upper end of the string through the gasket.
- Set the gasket over the horn outside of the check valve.
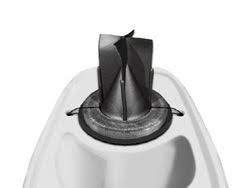
Securing the Check Valve and Gasket
- Knot both strings outside the bowl to secure the gasket and check valve in place.
- If a wax seal is used for the gasket, dry the bottom of the bowl and spread some wax under the check valve to ensure proper installation.
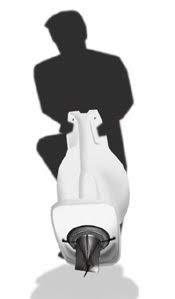
Setting the Bowl
- Set the bowl in the normal manner.
- Ensure the check valve extends through the center of the flange and opening.
- Remove the strings after the bowl is set to finalize the installation.